Kozmo Kitchen

Authentic Japanese Home Cooking

  • Order
  • What’s New
  • Meals
  • Classes
  • Catering
  • Recipes
  • About
  • Contact

Salmon Nanban Zuke

September 2, 2017 by KozmoKitchen Leave a Comment

The arrival of Copper River salmon in May gets Seattleites delighted and excited because it means the kickoff of summer in the Northwest, the long-awaited joyous season of sunshine and blue skies for the next three months. Local grocery stores and restaurants start showcasing Cooper River salmon, known for its succulent texture and rich flavor. It’s pricey (although buying a whole fish can save you a lot of money) but definitely worth trying while it’s available (for season updates, see http://www.copperriversalmon.org/press-news). And even if you miss the opportunity to taste Copper River salmon, there is a wide variety of other wonderful kinds of salmon that can inspire you to cook numerous recipes through summer and into fall — from simple grilled fillets or steaks to super-fresh sashimi or sushi.

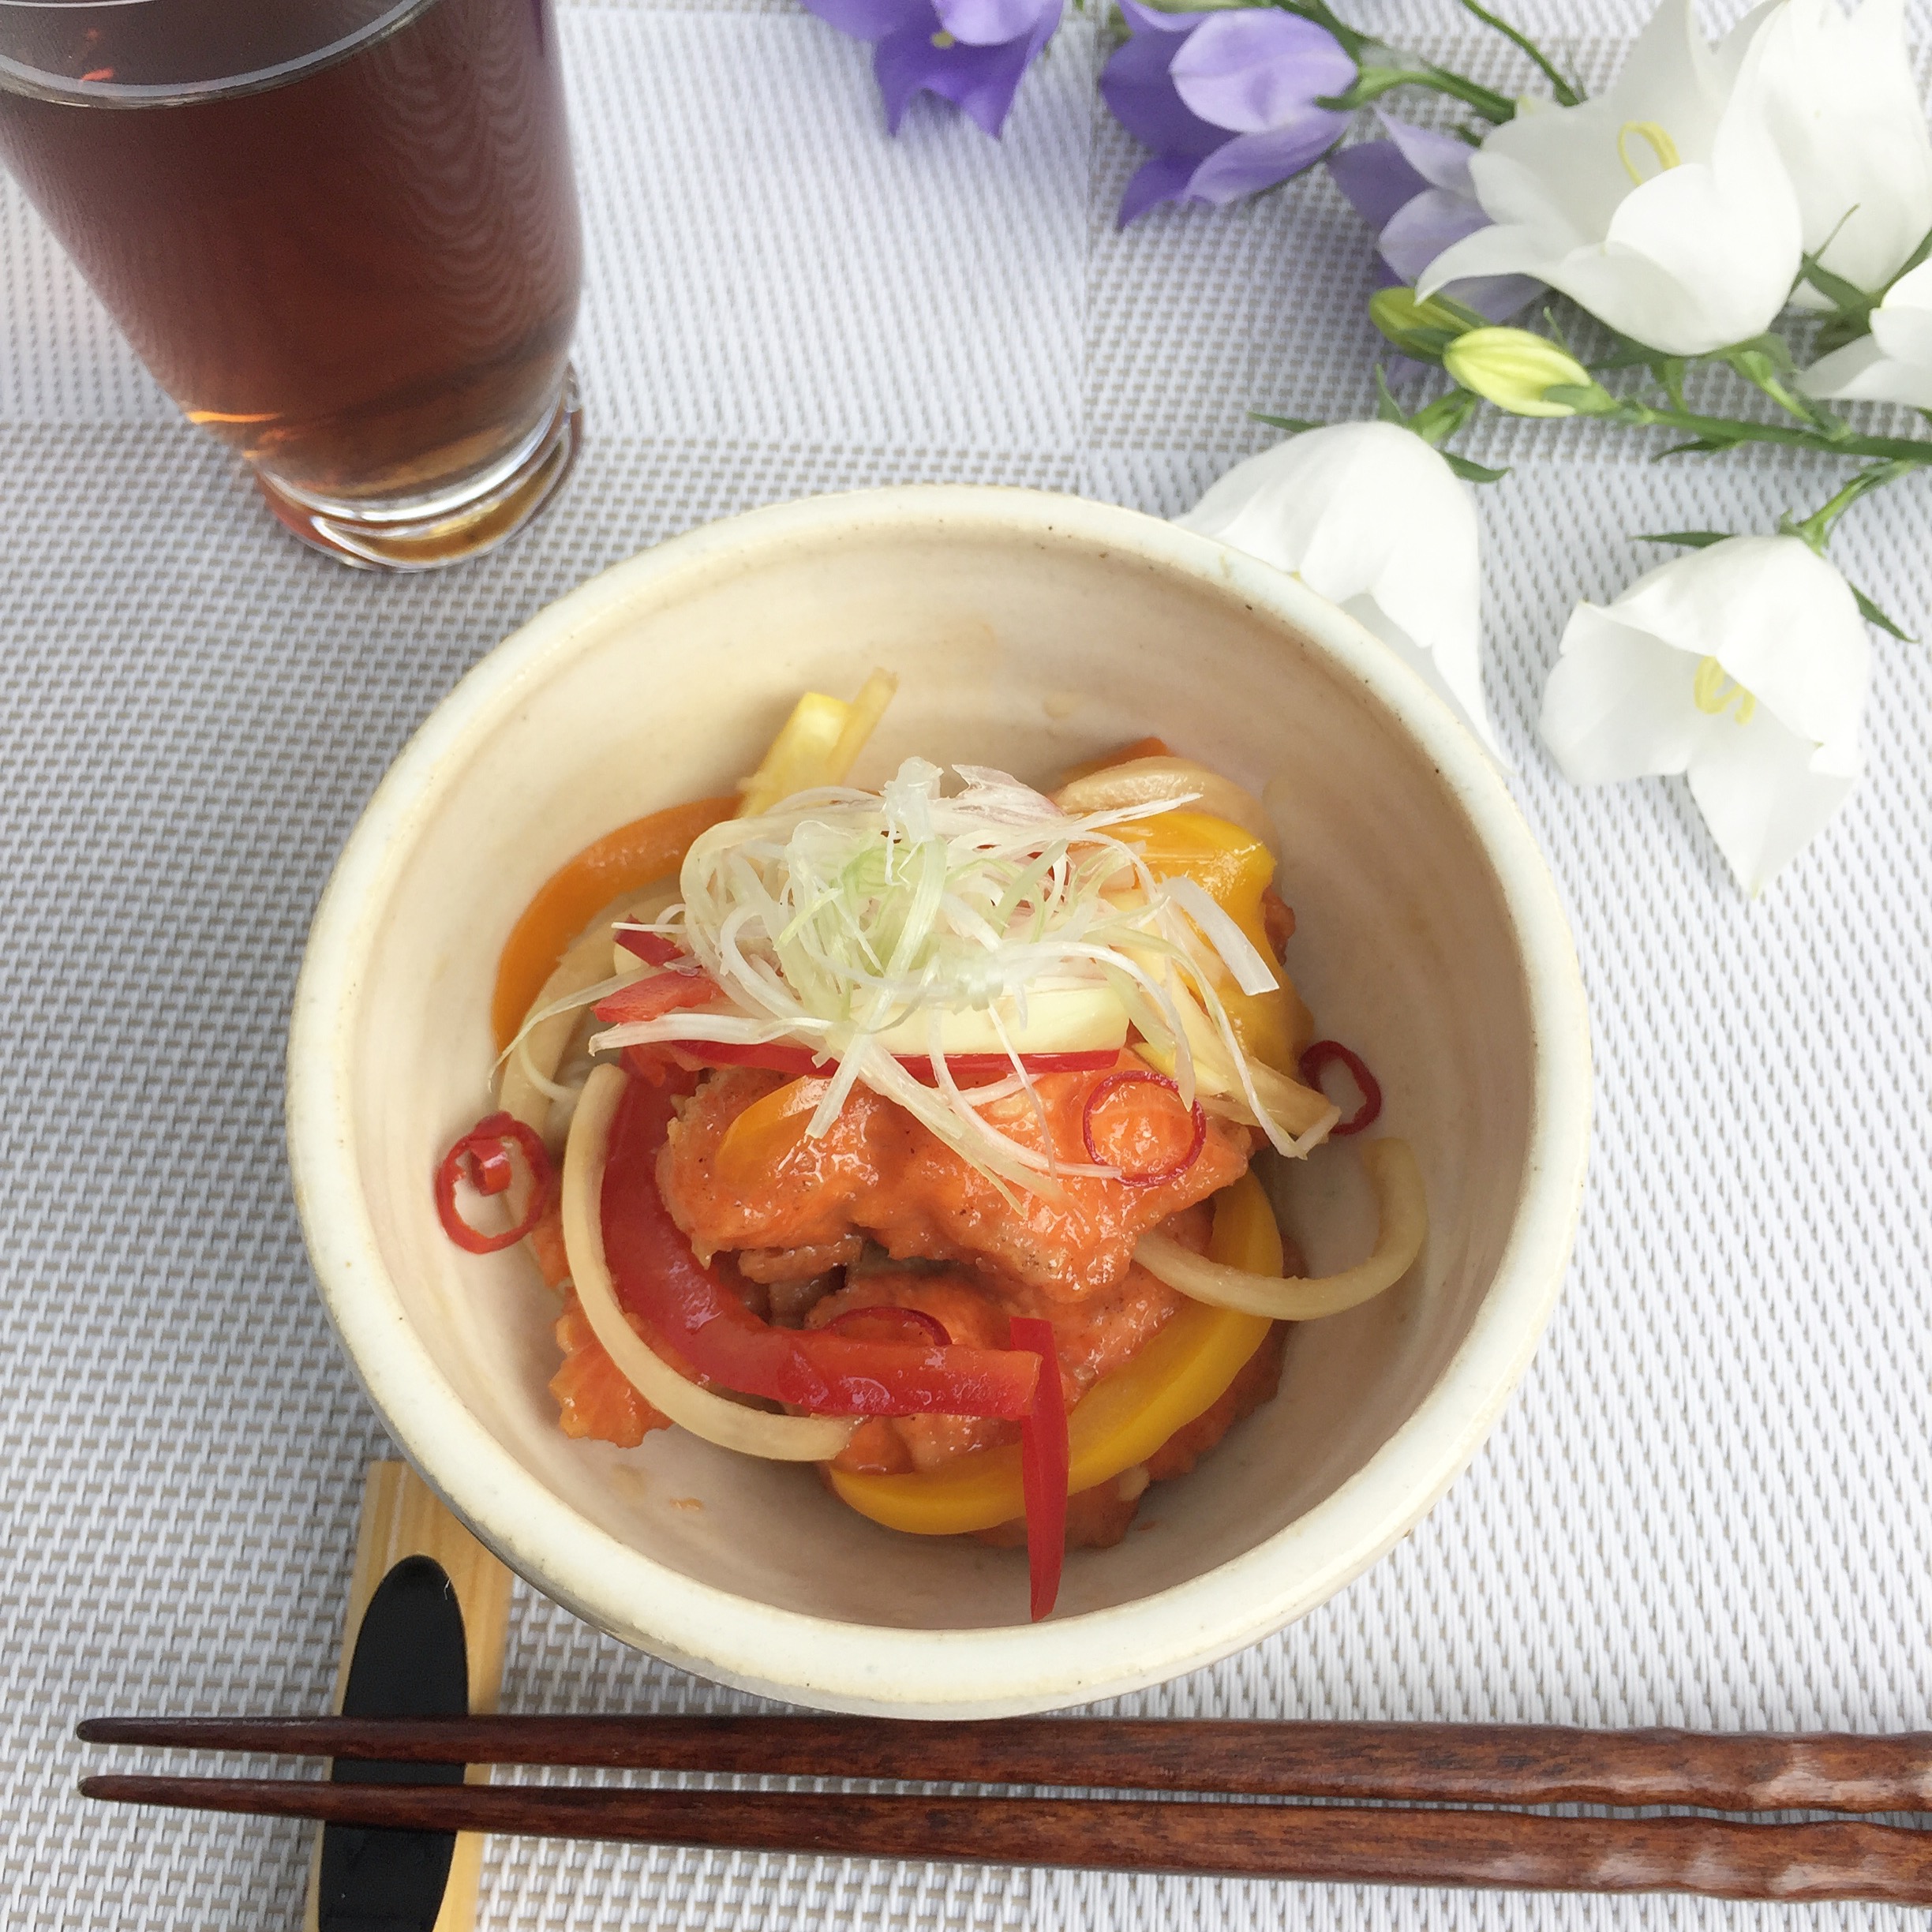
Now here is a great summery recipe that I love and highly recommend that you add to your salmon repertoire. Nanban Zuke is often made with small fish like Aji (Spanish mackerel), smelt, and sardine, and it works wonderfully with salmon as well. Fried salmon is marinated in sweet vinegar called Nanban zu along with fresh summer vegetables that add bright colors and flavor. You can serve it chilled as a refreshing appetizer on a hot summer evening. I hope there will be many occasions on which you can make Nanban Zuke, the perfect addition to your dinner menus this summer.


Print Recipe
Salmon Nanban Zuke
Course Appetizers
Cuisine Japanese
Prep Time 30 minutes
Cook Time 10 minutes
Passive Time 3 hours
Servings
people
Ingredients
  • 13 fl. oz. kombu dashi a 2-inch piece of kombu (dried kelp) soaked in 13 fl. oz. of water at room temperature for 30 minutes)
  • 4 tbsp. soy sauce
  • 3 tbsp. sake
  • 2 tbsp. mirin
  • 4 tbsp. sugar
  • 1 lb fresh salmon fillets skin removed and cut into bite-sized
  • ½–1 tsp. salt
  • ½ tsp. white pepper
  • ½ cup potato starch
  • 1 quart high-heat oil for frying such as canola or rice bran
  • 1 medium yellow onion peeled, halved, and thinly sliced lengthwise (about 12 oz.)
  • 2 bell peppers (red, yellow, or orange), cored, seeded, and thinly sliced
  • red chili flakes optional
  • 2 green onions white part only, for shiraga negi garnish
Instructions
  1. Make Nanban zu. In a medium saucepan, combine all ingredients for the vinegar. Bring to a boil over high heat, and then turn off the In a Dutch oven or deep pot, heat oil over high heat to 325F.
  2. Sprinkle salmon pieces with salt and pepper and let sit for 10 minutes. Wipe off excess water with a paper towel (do not rinse the fish under running water). Place the potato starch in a medium bowl, add the salmon pieces, and toss to coat.
  3. Shake excess potato starch off salmon pieces and put them in the frying oil. Cook for about 2 to 3 minutes and increase the heat to 350F. Cook for another minute or two until the surface looks nice and crisp.
  4. Transfer salmon pieces to a rack, let stand for 30 seconds, and then immediately transfer them to the container of nanban zu.
  5. Place the sliced onion, bell peppers, lemon slices, and red chili flakes on top of the salmon. Cover with a sheet of plastic wrap, pressing lightly onto the surface so that there’s no air under the wrap. Refrigerate for at least three hours or overnight.
  6. Make shiraga negi (onion garnish). Cut the root end off the green onion, cut off the green tops, and then cut the remaining white section into inch-long pieces. To each white section, make a lengthwise cut without cutting all the way through, and remove the core. Lay the outer layers flat and then cut them lengthwise into very thin strips. Soak the cut pieces in ice water for 30 minutes. Drain and pat dry.
  7. Transfer the salmon and vegetables to serving bowls and garnish with shiraga negi.
Share this Recipe
 

Filed Under: Appetizers, Uncategorized

Sansai Okowa (Sweet Rice with Edible Ferns)

May 15, 2017 by KozmoKitchen Leave a Comment

Print Recipe
Sansai Okowa (Sweet Rice with Edible Ferns)
Prep Time 15 minutes
Cook Time 30 minutes
Passive Time 8 hours
Servings
people
Ingredients
  • 1 package Sansai Mix (approx. 200g package)
  • 3 cups Sweet Rice (1 cup = 180 ml)
  • 2 sheets Abura Age (fried bean curd) (2 recutangular sheets)
  • 1/2 carrot (approx. 3oz)
  • 1 burdock root (approx. 4oz)
  • 6 pieces dried shiitake mushrooms
  • 2 cups water (1 cup = 180ml)
  • 2 stalks green onion (or 1/2 bunch mitsuba)
  • 1 pound chicken thigh (optional)
  • 2 tablespoons soy sauce
  • 1/4 cup sake
  • 1/4 cup mirin
  • 2 + 1 teaspoons salt
Instructions
  1. (On the day before the cooking) Rinse sweet rice quickly under running water (no need to scru the rice) and soak it in plenty of clean water overnight.
  2. (On the day before the cooking) Soak dried shiitake mushrooms in 2 cups of water overnight.
  3. On the cooking day, julienne carrots into and inch long strips, slice burdock root thinly into an inch long strips (or shave it thinly using sasagaki cutting method). Squeeze water out of the dried mushrooms ad slice the mushrooms thinly. Rinse aburaage with hot tap water, squeeze excess water and chop it into 1/4 squares.
  4. Strain the sansai mix of water.
  5. Cut green onion into thin slices. Or you use mitsuba, chop the greens coarsely
  6. Optionally cut chickin thigh into 1/4 inch squares.
  7. In a medium sized sauce pan, put the shiitake soaked water and heat it over high heat.
  8. Add in sake, mirin, 2 teaspoons of salt and soy sauce.
  9. Add in all the vegetables, sansai and abura age (and chicken if you use it). Cook the ingredients until they are just cooked for about 10 minutes.
  10. Using a collandar, strain the cooked solids of the liquid. Reserve the liquids in a bowl.
Using a rice cooker
  1. Strain sweet rice of water and put the rice in the rice cooker. Add the reserved liquid in to the level "3 cups fo mixed rice". Add in the solid ingredients on top. Cook the rice mixture as instructed for the rice cooker.
Using a steamer
  1. Use a two layered steamer. In the bottom pan, fill water in. Put the top layer on, speard a cotton cloth wide enough to cover the entire bottom and sides, put a lid on and heat the steamer over high heat.
  2. Once the steamer starts boiling (i.e. steam comes out of the steamer vigorously), add in sweet rice. Put the lid back on and cook for 15 miutes until the rice is just cooked but maintains al dente consistency.
  3. Transfer the cooked rice into the reserved liquied in the bowl. Coat the irce in the liquid well. Transfer the rice back into the steamer. Put the lid back on. Cook another 5 minutes.
  4. Place the solid ingredients on top of the rice in the steamer. Cook for another 5 minutes. Check the consistency of the rice. If it's fully cooked then it's done. Cook another 5 minutes if necessary.
  5. Transfre the okowa into a large bowl and toss it with the vegetables well using a spatula. Add another 1 teaspoon of salt if needed .Garnish wtih chopped gren onion or mitsuba.
Share this Recipe

Filed Under: Rice, Uncategorized

Azuki Bean Rice

March 19, 2017 by KozmoKitchen Leave a Comment

Print Recipe
Azuki Bean Rice
Rice is a staple ingredient in Japanese cooking and can be served plain (unseasoned), or cooked and seasoned with other ingredients. Azuki is sometimes cooked with sweet rice to make Sekihan, which is often served on celebratory occasions, but Azuki rice can be your everyday rice choice!
Course Rice
Cuisine Japanese
Servings
Ingredients
  • 2 cups short-grain sushi rice 2 Japanese cups(180ml each) or 1.5 US cups (237ml each)
  • 2 level Plain water + azuki water Water level for 2 cups rice or 1.65 US cups of water
  • 1/4 cup dry azuki beans 50 g
  • 1 teaspoon salt you can reduce to 1/2 teaspoon
Instructions
  1. Rinse the rice well in running water until the water runs clear.
  2. Strain rice and put it into an electric rice cooker or deep heavy pan such as a Dutch oven.
  3. Rinse and strain azuki beans. Cook them in boiling water for a few minutes and discard the water. Add clean water into the pan and cook azuki over low heat for about 1 hour or until the beans get al dente consistency (i.e. the center of the beans can be uncooked). Separate the beans and the cooking water. Save the azuki water.
  4. Combine the azuki water and plain water to make up to the 2 cups line in the rice cooker or add 1.65 cups of water to the Dutch oven. Add salt and azuki beans.
  5. Rice cooker: Cook the rice with azuki as you normally cook white rice.
  6. Dutch Oven: Cook over high heat to bring to boil, then put the lid on, turn down to simmer and cook for 12 minutes. Turn off the heat, with the lid on, let it sit for 15 minutes.
  7. Use a spatula to fluff the rice and toss it well with the other ingredients.
  8. You can sprinkle sesame seeds over rice and enjoy!
Share this Recipe

Filed Under: Rice, Uncategorized, vegan

Matsutake Gohan

October 24, 2016 by KozmoKitchen Leave a Comment

Print Recipe
Matsutake Gohan
It's Matsutake season! You can't let the fall go without trying the mesmerizing aroma of Matsutake! Love living in the Northwest!
Course Rice
Cuisine Japanese
Prep Time 15 minutes
Cook Time 35 minutes
Servings
people
Ingredients
  • 3 to 4 matsutake mushrooms
  • 2 cups short grain ricce 1 cup = 200ml
  • 2 cups Katsuo dashi 1 cup = 200ml
  • 2 tablespoons sake
  • 1 tablespoon soy sauce usukuchi (light-colored) if possible
  • 1 teaspoon salt you can add/reduce to your taste
Instructions
  1. Clean matsutake with damp paper towel if you see any dirt. You can shave off the very bottom of the mushroom if it's too dirty.
  2. Slice matsutake mushroom stems, and tear the stump by hand into small pieces.
  3. Rinse and polish rice and strain it through a collandar. Put it aside (for about 30 minutes)
  4. In a Dutch oven or any deep pot you have, put in the rice and add dashi, soysauce, sake and salt. Add in sliced matsutake. If you have an electric rice cooker. Note: If you have an electric rice cooker just cook the matsutake rice with all the ingredients as you normally cook rice.
  5. Place the pot, turn on the heat over High and wait for the liquid to start boiling. A lid is not required.
  6. Turn the heat down to simmer, put the lid on if you haven't done it yet, then cook for 12 minutes. Turn off the heat then but do not remove the lid yet.
  7. Wait for 15 minutes. Open the lid and fluff the matsutake rice! Don't pass out with the incredible aroma!
Share this Recipe

Filed Under: Rice Tagged With: Japanese, matsutake, mushrooms, rice, vegetarian

Shio Koji Marinated Pork

October 18, 2016 by KozmoKitchen Leave a Comment

Print Recipe
Shio Koji Marinated Pork
Experience Koji magic! Easy shio koji marinade gives wonderful umami flavor and amazingly tender texture to your everyday pork!
Course Main Dish
Cuisine Japanese
Prep Time 10 minutes
Cook Time 15 minutes
Passive Time 8 hours
Servings
people
Ingredients
Shio Koji
  • 22 grams salt
  • 100 grams dry rice koji
  • 100 ml water
Marinated Pork Loin
  • 1/2 cup Shio Koji
  • 2 fillets Pork Loin approx. 1 pound
  • 1 tablespoon fresh ginger grated
  • 1 teaspoon garlic minced
  • oil for cooking
Instructions
Shio Koji
  1. In a storage container such as a glass jar with a lid, mix water and salt well until salt is completely dissolved.
  2. Add dry koji and mix with the salt & water. Put the lid on but do not close the container tightly. Carbon dioxide produced during fermentation should be able to escape.
  3. Leave the container at the room temperature, stirring the content once a day.
  4. In one week to 10 days, when the koji becomes creamy, it's ready for use.
Koji Marinated Pork Loin
  1. Combine shio koji, garlic, and ginger well.
  2. Put the pork fillets and koji marinade together in a ziploc bag. Massage the pork, making sure to squeeze all the air out of the bag. Seal the bag and refrigerate it for 8 hours or overnight.
  3. Take the pork fillet out of the bag and wipe off excess marinade with paper towel, as the koji tends to burn quickly on a pan.
  4. Heat cooking oil in a cast iron or stainless steel pan over medium-high heat. Place the pork in the pan.
  5. While cooking one side put the lid on and turn the heat down to medium. Cook for about 5 minutes.
  6. Flip the pork, put the lid back on, and cook the other side for another 5 minutes or longer until the meat is cooked through.
Share this Recipe

Filed Under: Main Tagged With: Japanese, koji, pork

  • 1
  • 2
  • Next Page »

Welcome to Kozmo Kitchen Japanese Home Cooking

Traditional recipes made from scratch and offered in a variety of premium bento boxes. Enjoy lunch delivery or dinner pick-up at select locations in downtown Seattle. Join our cooking classes at PCC and Chef Shop. Let us cater your next event. And have us to your home or office for parties, classes and private chef services everyone will love. Come home to Kozmo Kitchen!

Kozmo Kitchen AuthenticJapaneseHomeCooking Order Online Meals, Classes, Products Now at shop.kozmokitchen.com

Join Our Mailing List!

Instagram Photos Feed with such ID does not exist

About Kanako

I am a Japanese native following her dream of bringing Japanese home cooking to Seattle. I love sharing the culinary traditions I grew up with. Making people happy through great food and dining experiences. And creating that feeling of family and home that only a nurturing hand crafted meal can provide. I see a world where everyone can make Japanese home cooking a part of everyday life that brings warmth, comfort and joy. Please allow me to share it with you.

Contact Me

  • Email
  • Facebook
  • Instagram
  • LinkedIn
  • Twitter

Recent Posts

  • Happy Hour Catering
  • Learn Japanese Home Cooking
  • Party Catering with Kozmo
  • Custom Bento Catering For Special Events
  • Kozmo Kitchen at Bite of PhinneyWood!
  • Onigiri Popup Weekend
  • Let’s Have A Sushi Party – Cooking Class
  • Let’s Make Onigiri
  • Thank You, See You Again Soon
  • Kozmo Kitchen Update

LINKS

Japanese Blog (今宵のサカナ) Archive

PCC Cooks

Chef Shop

North American Post

Copyright © 2025 · Foodie Pro Theme by Shay Bocks · Built on the Genesis Framework · Powered by WordPress